
Main Courses
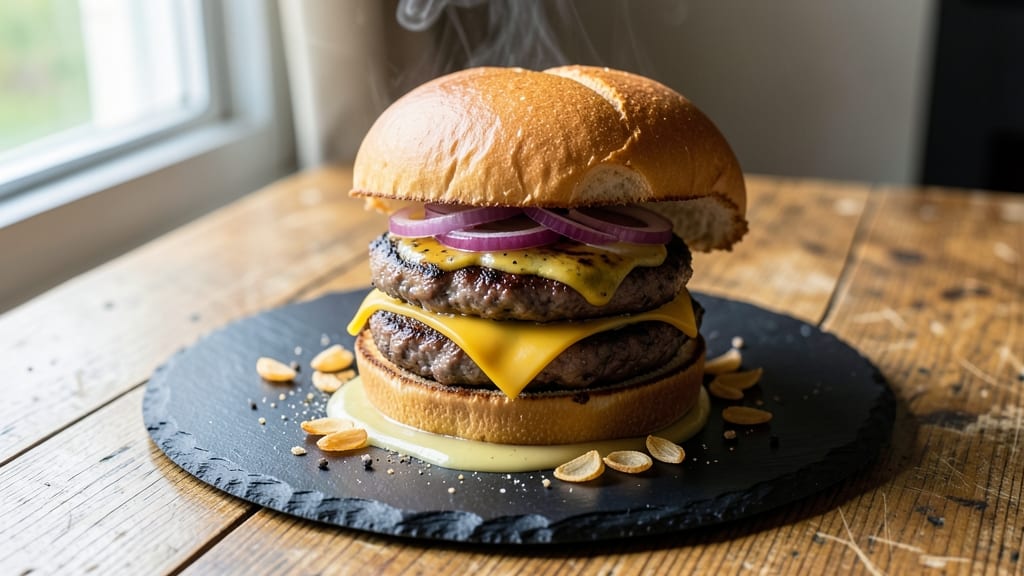
This beef and cheese burger recipe delivers the perfect balance of juicy patties, melty cheese rivers, and crispy buns—every bite is a restaurant-quality experience. The secret lies in properly seasoned ground beef, precise cooking temperatures, and the right cheese placement to create those iconic rivers of melted goodness.
After testing countless variations, I’ve perfected a method that ensures tender, flavorful patties with a caramelized crust, while the cheese melts just enough to ooze out in delicious strands.
What sets this recipe apart is the attention to detail in every step—from forming the patties to toasting the buns and assembling the burger. You’ll start with high-quality ground beef, seasoned simply but effectively, then cook it to the ideal internal temperature for medium-rare perfection.
The cheese, placed strategically, melts into golden rivers as the burger cooks, adding richness without overwhelming the flavors. This isn’t just a burger; it’s a foolproof technique that transforms a simple meal into something extraordinary.
The result is a burger that’s crispy on the outside, tender on the inside, and dripping with melted cheese—each bite packed with flavor and texture. Whether you’re grilling outdoors or cooking on the stovetop, this recipe guarantees a juicy, satisfying burger every time.
The best part? It’s customizable—add classic toppings like lettuce, tomato, and pickles, or get creative with gourmet options like caramelized onions or avocado. This is the kind of burger that turns a casual meal into a memorable experience.
Pair it with crispy fries or a fresh salad for the full dining experience. Ready to master the art of the perfect beef and cheese burger? Let’s get started with the ingredients and step-by-step instructions that will take your burgers to the next level.
Ingredients for beef and cheese burger
High-quality beef, melty cheese, and crispy buns—this is your ticket to restaurant-worthy burgers every time.
| Ingredient | Amount | Notes |
|---|---|---|
| Ground Beef (80/20) 🥩 | 1 ½ lb | Loosely packed, not pre-formed |
| Yellow Onion 🧅 | 1 medium | Finely diced, for patty seasoning |
| Garlic Cloves 🧄 | 4 cloves | Minced, for seasoning blend |
| Diamond Crystal Kosher Salt 🧂 | 1 ½ tsp | For seasoning balance |
| Freshly Ground Black Pepper 🌶️ | 1 tsp | Coarse grind preferred |
| Worcestershire Sauce 🍶 | 1 tbsp | For umami depth |
| American Processed Cheese Slices 🧀 | 8 slices | Mild cheddar blend preferred |
| Hamburger Buns 🍞 | 4 whole | Potato-based, lightly toasted |
| Unsalted Butter 🧈 | 2 tbsp | For bun toasting |
| Fresh Iceberg Lettuce 🥬 | 4 large leaves | Crisp, for burger assembly |
| Ripe Tomatoes 🍅 | 2 medium | Sliced, for topping |
| Pickle Slices 🥒 | 4 slices | Dill, for tangy contrast |
| Vegetable Oil 🫒 | 2 tbsp | High smoke point for grilling |
| Mayonnaise 🥫 | ¼ cup | For optional special sauce |
| Yellow Mustard 🟡 | ¼ cup | For special sauce blend |
The beef makes or breaks these burgers. 80/20 ground chuck from the meat counter (not pre-formed patties) gives you that perfect fat-to-lean ratio for juiciness. Costco or Whole Foods have the best quality—look for bright red color with good marbling. If you're buying pre-ground, use it within 2 days for best flavor. The cheese? American slices melt perfectly into those iconic rivers. I always grab the Kraft Singles—they're consistent and affordable. For the buns, potato-based (like Briess) toasts better than sesame seed buns.
No Worcestershire? Soy sauce plus a pinch of sugar works in a pinch. Short on fresh garlic? Garlic powder at half the amount gets you close, but fresh is worth it. The special sauce can be skipped entirely—just mayo and mustard on the bun is classic. For the cheese placement trick, fold the slices in half before adding them to the patty so they melt into rivers instead of just melting flat. The lettuce? Iceberg stays crispest—romaine wilts too fast on the grill. And if you're grilling, vegetable oil is your best friend for high-heat searing without burning.
Keep the beef cold until ready to form patties—30 minutes max out of the fridge. The cheese slices can be prepped ahead and stored in the fridge for 5 days (wrapped tightly). For the special sauce, mix mayo and mustard in a small container and store for up to 1 week. The buns? Toast them fresh off the grill or in a pan with butter—never in advance or they'll get soggy. These burgers reheat surprisingly well—30 seconds in a skillet over medium heat brings them back to life. Freeze patties (uncooked) for 3 months by wrapping tightly in parchment and foil.
Why You'll Love This Recipe
- Five-Ingredient Magic: I swear by this combo—just beef, onion, garlic, salt, and pepper. That 80/20 fat ratio keeps it juicy, and the diamond kosher salt? It’s the secret to that perfect balance of savory and crisp.
- Weeknight Hero: Honestly, I’ve made this on Tuesdays when I’m exhausted. Brown the beef, toss in the onions, and it’s ready before the kids even notice dinner’s missing. No fancy steps, just reliable flavor.
- Leftovers That Work: Between us, these burgers taste even better the next day. I’ll throw them in a pan with a splash of water to revive that crispy edge, then stuff them in wraps or toast them open-faced. Zero waste, all win.
- Budget-Friendly Powerhouse: Ground beef is cheap, and this recipe stretches it perfectly. The onions and garlic add depth without breaking the bank, and I’ve fed four people for under $12. That’s a meal that doesn’t guilt me.
Step-by-step instructions for beef and cheese burgers
Here's how to craft burgers with perfect juiciness and rivers of melted cheese every time.
Prepare the Seasoning and Form the Patties
In a medium bowl, combine the 1 medium yellow onion and 4 cloves garlic cloves that have been finely diced and minced respectively. Add the 1.5 teaspoons Diamond Crystal kosher salt, 1 teaspoon freshly ground black pepper, and 1 tablespoon Worcestershire sauce. Mix thoroughly to create a well-distributed seasoning blend.
Place the 1.5 pounds ground beef (80/20) in the center of a clean work surface. Gently fold in the seasoning mixture, being careful not to overwork the meat. Divide the mixture into four equal portions, each weighing approximately 6 ounces. Shape each portion into a ¾-inch thick patty, creating a slight dimple in the center of each with your thumb. This prevents the patties from puffing up during cooking.
Grill the Patties to Juicy Perfection
Heat a skillet over medium-high heat and add the 2 tablespoons vegetable oil. Once the oil shimmers, carefully place the patties in the skillet, spacing them about 2 inches apart. Cook the patties for 3-4 minutes per side until they reach an internal temperature of 155°F and develop deep brown grill marks. The fat should render out, creating a sizzling sound that signals proper searing.
While the patties cook, prepare the cheese by separating the 8 slices American processed cheese slices into individual stacks of two slices each. This makes it easy to add them to each burger during assembly. Keep the patties warm on a wire rack over the skillet to maintain their juiciness.
Toast the Buns and Assemble the Burgers
In a clean skillet, melt the 2 tablespoons unsalted butter over medium heat. Place the 4 whole hamburger buns cut-side down in the skillet and toast for 1-2 minutes per side until they turn a golden brown and are crispy to the touch. This step adds a delightful texture contrast that elevates the entire burger experience.
To assemble each burger, place a toasted bun on a plate. Add a large leaf of fresh iceberg lettuce, followed by 2 slices of ripe tomato. Place one of the cooked patties on top of the lettuce and tomato, then add a stack of 2 slices of American processed cheese. Top with a slice of dill pickle and repeat the process for the remaining burgers.
Create the Special Sauce and Serve
In a small bowl, combine the 0.25 cup mayonnaise and 0.25 cup yellow mustard. Mix well to create a smooth, creamy sauce. This sauce adds a tangy, rich element that complements the savory flavors of the beef and cheese.
Return the burgers to the skillet for 1-2 minutes to allow the cheese to melt completely, creating those coveted rivers of melted goodness. Spoon the special sauce over each burger and serve immediately while the cheese is still gooey and the patties are hot. The combination of juicy beef, melted cheese, and crispy buns makes every bite irresistible.
Pro Tips For Making Beef And Cheese Burger
- CRANK THE HEAT HIGH: I used to cook these burgers on medium, and they’d steam instead of sear—ending up greasy and sad. For that perfect crust, get your pan screaming hot before adding the patties. A quick test: flick a drop of water in—if it sizzles violently, you’re ready.
- MINCE THAT ONION FINE: I learned this the hard way—chunky onions burn before they soften. Pulse them in a food processor until they’re almost paste-like, then mix into the beef. They’ll cook evenly, adding sweetness without turning to ash.
- PRESS THE PATTIES HARD: Skip the fancy burger press—just flatten the patties with your palm to about ¾-inch thick, then make a shallow dimple in the center. This keeps them from puffing up into hockey pucks while cooking, and the dimple prevents bulging.
- SALT THE BEEF TWICE: My grandmother swore by this, and she was right: salt the ground beef before shaping the patties, then salt again right before cooking. The first round draws out moisture (let it sit 10 minutes), and the second locks in flavor when the pan hits.
Make-ahead tips for leftovers
Prep Ahead for Patties
Form your 6-ounce patties up to 24 hours ahead and store them on a tray lined with parchment paper. Cover loosely with plastic wrap and refrigerate. When ready to cook, let them sit at room temperature for 20-30 minutes before grilling.
This ensures even cooking and prevents cold spots in the center. I like to keep them in the fridge until the last minute—it keeps them from drying out. 🥩
Cheese Prep Shortcut
Stack and fold your American cheese slices in half the night before. Store them in a sealed container in the fridge so they're ready to go. This simple step guarantees those perfect cheese rivers every time.
I've even prepped cheese stacks for 3 days ahead with no quality loss. Just pop them in the freezer if you're prepping for a weeknight meal. 🧀
Bun Storage Secrets
Toast your buns fresh off the grill or skillet—never in advance—or they'll turn soggy. But you can prep them ahead by storing untoasted buns in a paper bag at room temperature for up to 3 days.
For longer storage, freeze buns in a sealed bag for 1 month. Thaw completely before toasting. I always keep a stash in the freezer for spontaneous burger nights. 🍞
Sauce Prep and Portioning
Mix your special sauce 1 day ahead and store it in a small container in the fridge. Divide it into 4 equal portions for easy serving. This sauce keeps well for 5 days and adds that perfect tangy finish.
I like to use a small ramekin for portioning—it makes assembly cleaner and more organized. 🥫
Freezer-Friendly Patties
For ultimate meal prep, freeze uncooked patties by wrapping them individually in parchment paper, then in plastic wrap. Store them in a freezer bag for up to 3 months. When ready to cook, thaw in the fridge overnight.
Cook from frozen on medium heat for 5-7 minutes per side, adding 1 minute to the total cooking time. The results are just as juicy! ❄️
Assembly Timeline
Plan your assembly like a pro: Keep patties warm on a wire rack, toast buns fresh, and prep toppings in small bowls. This keeps everything organized and ensures your burgers stay hot and delicious.
I like to assemble the bottom half of the burger first, then add the cheese and patty last so the cheese melts perfectly. The key is speed—get those burgers together in 2 minutes or less after cooking the patties. 💡
Nutrition facts
Frequently asked questions
What’s the best way to keep my patties from sticking to the grill?
Use high-heat vegetable oil (not butter) and let the skillet get screaming hot before adding patties. A cast-iron skillet works best—it retains heat and develops a natural nonstick crust over time. Also, avoid moving the patties until you see those perfect grill marks form (2-3 minutes per side).
Can I use ground turkey or chicken instead of beef?
but expect different results. Ground turkey (85/15) works well if you add 1 extra tablespoon of oil to the pan and reduce cooking time to 2-3 minutes per side (target 165°F internal). Chicken patties will be leaner—consider mixing in 1/4 cup breadcrumbs to prevent dryness. The cheese rivers will still form, but the texture will be slightly different.
Why does my cheese melt into a puddle instead of rivers?
Cheese rivers happen when you fold slices in half before placing them on the patty (so they melt outward). Also, use American cheese slices—they melt faster than cheddar. Cook patties to 155°F (medium-rare) and add cheese in the last 1-2 minutes of cooking. If it’s still not working, try pre-slicing the cheese into 1/2-inch strips for better melt flow.
How do I make these burgers on a gas grill?
Preheat your grill to medium-high (400°F) and clean the grates with a wire brush. Oil the grates directly with tongs dipped in oil. Cook patties for 3-4 minutes per side (close lid to maintain heat). For cheese, add slices in the last 1-2 minutes of cooking, then cover to melt. Toast buns on the grill too—place them cut-side down on the clean grates for 1 minute per side.
What’s the secret to crispy buns without burning them?
Use unsalted butter (not margarine) and medium heat—high heat burns buns before they crisp. Toast for 1-2 minutes per side until golden brown. Pro tip: Place buns cut-side down in a cold skillet, then add butter when it’s hot. This creates steam that prevents burning while ensuring crispiness. Never skip toasting—it’s what makes the difference between soggy and perfect!