
Main Courses
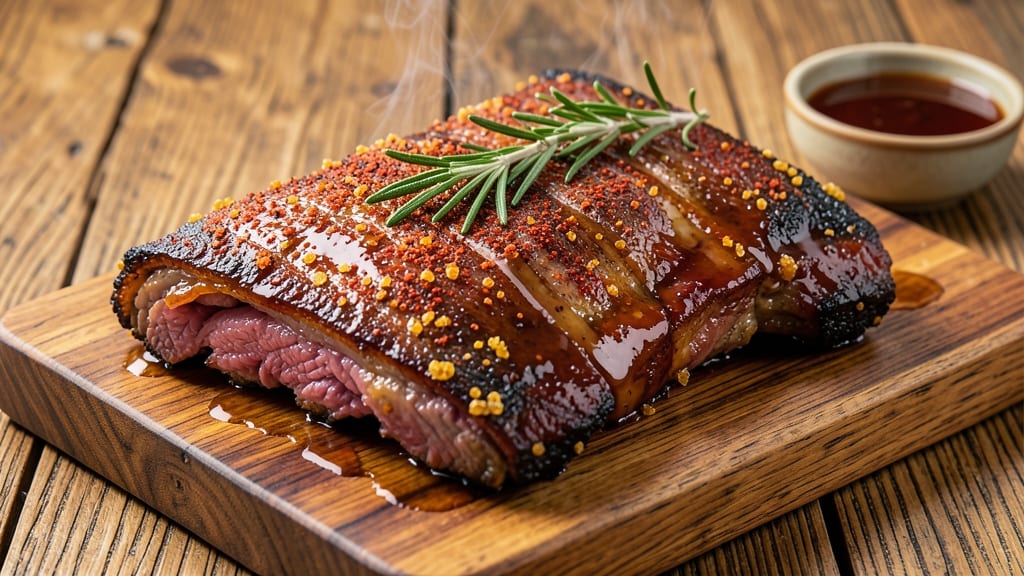
Mastering a beef back ribs recipe on a gas grill transforms a simple cookout into a showstopping meal—where tender, sticky-sweet meat meets smoky crust perfection. 🔥 The secret lies in two-zone fire mastery: indirect heat for slow cooking and direct heat for that coveted bark.
I've been perfecting this technique for years, and it never fails to deliver ribs that fall apart at the touch of a fork.
The foundation starts with a dry rub packed with brown sugar for caramelization, smoked paprika for depth, and a touch of cayenne for heat. This isn't just any rub—it's the blend that creates that irresistible sticky crust while keeping the meat tender inside.
The key? Patience. We're talking low-and-slow cooking that lets collagen break down and flavors meld, all while you control the heat zones like a pro.
By the time you're done, you'll have ribs with a glossy, caramelized bark that cracks slightly when you cut into them, revealing meat so tender it practically melts in your mouth. The sauce?
Optional but recommended—a simple glaze of apple cider vinegar and brown sugar that enhances the natural sweetness without overpowering the rub. This is the kind of dish that makes guests ask for seconds before dessert even arrives.
Serve with classic sides like grilled corn, tangy coleslaw, or buttery dinner rolls to soak up every last bit of that sticky-sweet goodness. Here's how to make them—step by step, from prep to plate.
Ingredients for beef back ribs recipe gas grill
Four pounds of beef back ribs plus a smoky-sweet rub—this is your cookout game-changer.
| Ingredient | Amount | Notes |
|---|---|---|
| Beef Back Ribs 🥩 | 4 lb | Bone-in, cut into 2-rib sections |
| Brown Sugar 🍚 | ½ cup | Light or dark, packed |
| Smoked Paprika 🌶️ | 2 tbsp | For deep smoky flavor |
| Ground Black Pepper 🌶️ | 1 ½ tbsp | Freshly cracked preferred |
| Garlic Powder 🧄 | 1 tbsp | Not garlic salt |
| Onion Powder 🧅 | 1 tbsp | For sweet base notes |
| Cayenne Pepper 🔥 | ½ tbsp | Adjust for heat preference |
| Kosher Salt 🧂 | 1 tbsp | Diamond Crystal preferred |
| Apple Cider Vinegar 🍎 | ¼ cup | For glaze tanginess |
| Yellow Mustard 🥬 | 2 tbsp | Dijon works too |
| Vegetable Oil 🫒 | 2 tbsp | For rib coating |
| Wood Chips 🌳 | 1 package | Hickory or cherry preferred |
| Beer 🍺 | 1 cup | Optional for spritzing |
The ribs are non-negotiable here—bone-in, 2-rib sections cook perfectly on a gas grill. Costco or your local butcher usually carries them pre-cut, but if buying whole, trim the membrane first (it's that thin, silvery layer—peel it off with a butter knife). For the rub, Penzeys or Trader Joe's have great smoked paprika, but any grocery store brand works. Pro tip: Toast your spices in a dry pan for 30 seconds before mixing—they'll sing louder. The wood chips? Hickory gives classic BBQ smoke, but cherry adds a fruity twist that pairs beautifully with beef.
No smoked paprika? Regular paprika plus a pinch of liquid smoke gets you 80% there. Short on cayenne? Red pepper flakes at half the amount works too. The apple cider vinegar can be swapped for white vinegar or lemon juice, but it's worth tracking down the real stuff—Mott's or Bragg are my go-tos. Beer optional but recommended: any amber ale (like Fat Tire) adds depth when spritzed during cooking. And if you're wondering about the mustard—it's not just for flavor, it helps the rub stick to those slippery ribs (trust me, it's worth the 30 seconds of mixing).
Prep the ribs the night before—pat dry and refrigerate uncovered for maximum bark. The rub keeps for 2 weeks in an airtight container, so make extra for future grilling. Store cooked ribs wrapped in foil for 3 days or freeze for 3 months. Reheat gently in the oven with a splash of water to keep them moist. Leftovers? Shred them into tacos or nachos—game-changer for weeknight meals.
Why You'll Love This Recipe
- Grill in Minutes: I swear, these ribs take less time than waiting for takeout. Just slather the brown sugar and smoked paprika mix on raw ribs, fire up the gas grill to medium-high, and let it do the work—no babysitting required.
- Sweet-Smoky Magic: That caramelized brown sugar crust? It’s the star. The smoked paprika gives it depth, while the garlic powder sneaks in a savory punch that makes every bite feel like a hug from your favorite cook.
- Tailgate or Tuesday: Between us, these ribs work for game day crowds or a lazy night in. Double the batch, wrap leftovers for sandwiches, or serve as-is—no judgment here if you eat them all at once.
- Budget-Friendly Feast: A pound of beef back ribs stretches further than you’d think, especially when you bulk it up with sides. Plus, the spices cost pennies, so you’re basically making gourmet ribs on a grocery-store budget.
Step-by-step instructions for gas grill ribs with two-zone fire
Master the two-zone fire method for tender, caramelized ribs with a sticky-sweet crust.
🔥 Step 1: Prep and Season the Ribs for Maximum Flavor
Start by removing the beef back ribs from the refrigerator and patting them dry with paper towels. This step is crucial—wet ribs won't develop that perfect bark. Place them bone-side down on a wire rack set over a baking sheet to allow air circulation on all sides.
In a small bowl, combine the 0.5 cup brown sugar, 2 tbsp smoked paprika, 1.5 tbsp ground black pepper, 1 tbsp garlic powder, 1 tbsp onion powder, 0.5 tbsp cayenne pepper, and 1 tbsp kosher salt. Mix well, then generously coat both sides of the ribs with this dry rub. Press it in firmly so it sticks—this ensures deep flavor penetration. Let them sit at room temperature for 30 minutes while you prepare the grill.
🍳 Step 2: Set Up Your Two-Zone Fire
Arrange your gas grill for indirect heat by turning on only the burners on one side. Place a drip pan filled with 1 cup beer (this prevents flare-ups) on the opposite side. Soak the wood chips in water for 30 minutes, then add them to the smoker box or directly on the hot coals. You want medium heat—around 250-275°F—so adjust the burners to maintain this temperature.
When the grill reaches temperature and you see thin blue smoke (not thick white steam), you're ready. Place the ribs bone-side down on the cooler side of the grill, away from direct heat. Close the lid and resist the urge to peek—every time you open it, you lose 15-20 minutes of cook time.
⏰ Step 3: Cook Low and Slow for Tender Ribs
Cook the ribs for 2 hours with the lid closed, only flipping them once after 1 hour. You'll know it's time to flip when the edges start to darken and pull away slightly from the bone. This slow cook ensures the connective tissue breaks down, creating melt-in-your-mouth texture.
After 2 hours, prepare the glaze by mixing 0.25 cup apple cider vinegar and 2 tbsp yellow mustard in a small bowl. Brush this mixture generously over the ribs, then move them to the hotter side of the grill for 10-15 minutes to caramelize the glaze. Watch closely—they're done when the glaze is deep amber and slightly bubbly.
🔥 Step 4: Finish with a Sticky-Sweet Crust
Return the ribs to the cooler side of the grill and cook for another 30-45 minutes, basting with the glaze every 10 minutes. You're looking for a sticky-sweet crust that pulls away from the meat when you lift a corner. The internal temperature should reach 195-203°F—probe-tender is key here.
Once the ribs reach this temperature and the bark is deep mahogany, remove them from the grill. Let them rest for 10 minutes before serving. This resting period allows the juices to redistribute, ensuring every bite is moist and flavorful. Serve with extra glaze on the side for dipping!
Pro Tips For Making Beef Back Ribs Recipe Gas Grill
- Trim the Silver Skin: That thin, tough membrane on the bone side? Scrape it off before grilling—it’ll stay chewy no matter how long you cook. I learned this the hard way after eating three ribs in a row that felt like chewing shoe leather.
- Start with a Hot Fire: Crank your gas grill to 450°F for the first 10 minutes to sear the ribs and lock in flavor. After that, drop to 250°F and let them slow-cook—rushing the low-and-slow part just makes them dry.
- Wet the Sugar: Mix your brown sugar with a splash of water (about 1 tablespoon per 2 tablespoons sugar) before brushing it on. It’ll stick better to the ribs and caramelize faster—no more clumpy, falling-off mess.
- Check Internal Temp: Use a meat thermometer to hit 195°F at the thickest part of the ribs, not just the surface. I used to eyeball it and ended up with ribs that were either raw in the middle or overcooked outside.
Dietary considerations for these flavors
Gluten-Free Adaptations
This recipe is naturally gluten-free, but always double-check your rub ingredients—some brands of smoked paprika or spices may contain anti-caking agents with gluten. I use Trader Joe’s or Penzeys brands for certified gluten-free options. The apple cider vinegar glaze is also safe, but verify labels if you're highly sensitive.
The mustard can be swapped for Dijon-style mustard (check for gluten-free labels) or omit entirely—it’s not critical for flavor. 💛
Low-Carb/Keto Options
For a keto-friendly version, skip the brown sugar in the rub and replace it with 1 tbsp erythritol or monk fruit sweetener (like Lakanto) plus ½ tsp cinnamon for depth.
The apple cider vinegar glaze can stay the same, but reduce the mustard to 1 tbsp to cut carbs further. The ribs themselves are already keto-approved—just avoid serving with starchy sides like corn or dinner rolls.
Dairy-Free Considerations
This recipe is naturally dairy-free, but if you’re serving with sides, opt for dairy-free alternatives like cashew-based coleslaw (use Silk unsweetened cashew cream instead of mayo) or grilled vegetables. The mustard in the glaze is dairy-free, but always check labels—some brands add whey.
For extra richness, brush the ribs with olive oil instead of butter during the final basting.
Allergen-Friendly Swaps
For nut allergies, avoid mustard-based glazes—swap the yellow mustard for 1 tbsp honey or maple syrup (if not avoiding sugar). For soy allergies, ensure your smoked paprika isn’t processed in soy facilities (most aren’t, but Penzeys labels theirs clearly).
If you’re avoiding vinegar, replace the apple cider vinegar with lemon juice for brightness. Always cross-contaminate carefully if cooking for multiple allergies.
Protein Adjustments
For a lighter protein option, consider pork back ribs (they cook faster and are often more affordable). If you prefer chicken, use bone-in chicken thighs (they’re juicier than breasts) and reduce cook time to 1.5 hours.
For a vegetarian alternative, try mushroom or jackfruit ribs—marinate them in the same rub and grill for 20-25 minutes, flipping once. The glaze works beautifully on all options!
Nutrition facts
Frequently asked questions
Why do I need to pat the ribs completely dry before seasoning?
Dry ribs develop that perfect caramelized bark because moisture evaporates and reacts with the sugar in the rub. Wet ribs steam instead of sear, creating a soggy crust. Pat them dry with paper towels, then let them sit at room temperature for 30 minutes—this ensures even cooking and maximum flavor infusion.
How do I know when the ribs are done without cutting into them?
Look for three key signs: the bark should be deep mahogany and pull away slightly from the meat, the ribs should bend easily (like bending a bow), and the internal temperature should reach 195-203°F. If the meat pulls away from the bone with slight pressure, they're ready. Patience is key—rushing leads to tough ribs!
Can I use a gas grill without a smoker box for wood chips?
Soak the wood chips in water for 30 minutes, then place them directly on the hot coals or wrap them in aluminum foil with holes poked in the top. For extra smoke, add them to the drip pan (though this may create more steam than smoke). Hickory or cherry chips work best for beef ribs.
What if my grill doesn't have adjustable burners for two-zone cooking?
Turn off half the burners and place a heat deflector or aluminum foil pan on the cooler side to create an indirect heat zone. If your grill lacks a lid, cover it with heavy-duty foil to trap heat. The goal is 250-275°F indirect heat—use an instant-read thermometer to check. A charcoal chimney on one side can also help create temperature zones.
How can I prevent flare-ups when grilling ribs?
Use a drip pan filled with 1 cup beer or apple juice to catch drippings, and trim excess fat from the ribs. Keep the lid closed to reduce oxygen flow, and avoid spraying oil directly on the flames. If flare-ups occur, move the ribs to the cooler side of the grill immediately. A 10-minute rest before grilling also reduces initial flare risk.