
Soups & Stews
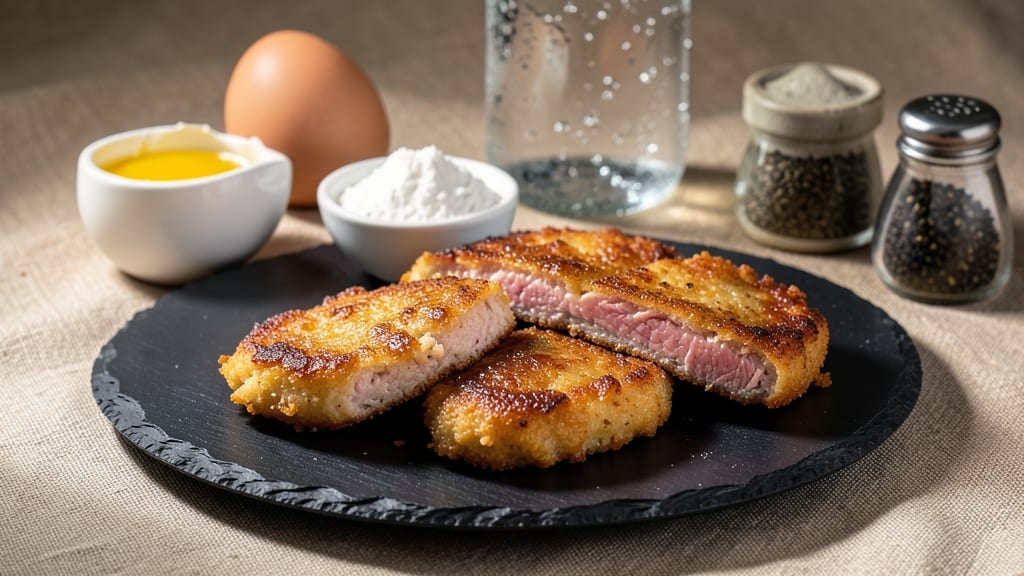
This beef batter recipe delivers the perfect balance of crispy golden crust and juicy centers—transforming simple beef cutlets into restaurant-worthy bites. The secret lies in a light, airy batter that clings perfectly while maintaining tender meat inside.
I've perfected this technique over years of testing, ensuring every piece emerges from the pan with that satisfying crunch and melt-in-your-mouth texture.
The process starts with properly pounded beef cutlets—thin enough for even cooking but thick enough to hold together. A simple batter of flour, eggs, and sparkling water creates the ideal crispy shell, while seasoning the meat beforehand infuses flavor deep into each bite.
Whether you prefer pan-frying for a lighter version or deep-frying for maximum crispiness, the result is consistently delicious.
What makes this recipe stand out is its versatility—serve these crispy beef bites as a main dish with a fresh salad or as an appetizer with dipping sauces. The batter technique works equally well with chicken or fish, making it a go-to method for any protein.
Once you try this, you'll never settle for store-bought frozen versions again.
For extra flavor, try adding a touch of paprika or garlic powder to the batter, or brush the cooked bites with a tangy sauce. The key is patience—don't rush the frying process, and let the meat rest briefly before serving.
This is comfort food elevated to gourmet status, and it's easier than you think to master.
Ingredients for beef batter
The secret to perfect crispy beef bites starts with these simple, quality ingredients.
| Ingredient | Amount | Notes |
|---|---|---|
| Beef Cutlets 🥩 | 1 ½ lb | Pounded to ¼-inch thickness |
| All-Purpose Flour 🌾 | 1 ½ cups | For light, airy batter |
| Large Eggs 🥚 | 2 whole | Room temperature preferred |
| Sparkling Water 💧 | 1 cup | Chilled for crispier batter |
| Salt 🧂 | 1 ½ tsp | Kosher or sea salt |
| Ground Black Pepper 🌶️ | ½ tsp | Freshly ground preferred |
| Garlic Powder 🧄 | 1 tsp | For extra flavor |
| Vegetable Oil 🫒 | 2 cups | For deep frying (or pan frying) |
| Paprika 🌶️ | ½ tsp | Smoked for color (optional) |
| Lemon Wedges 🍋 | 2 whole | For serving (optional) |
| Fresh Parsley 🌿 | ¼ cup | Chopped, for garnish |
The beef cutlets are non-negotiable here—look for well-marbled, evenly sized pieces at the meat counter. Costco or Whole Foods often carry high-quality cuts, but your local butcher can cut them to size if you ask. Pounding them to an even thickness (about ¼-inch) is key—too thick and they won’t cook through, too thin and they’ll dry out. I like to season them right after pounding so the salt and pepper really penetrate. For extra flavor, add a pinch of garlic powder to the meat before dredging in flour.
No sparkling water? Club soda works just as well—the bubbles are what create that light, crispy batter. Short on eggs? Flax eggs (1 tbsp ground flaxseed + 3 tbsp water) can replace one egg, but two is pushing it. The flour matters too—King Arthur or Gold Medal brands are reliable, but any all-purpose will do. For deep frying, vegetable or canola oil is best—it’s neutral and fries hot without burning. If you’re pan-frying, use about ½-inch of oil in your skillet and keep the heat medium-high. And trust me, don’t skip the sparkling water—it’s what makes the batter light and crispy.
Keep the cutlets in the fridge until ready to use—they’ll stay fresh for 2 days if wrapped tightly. The batter ingredients can be mixed ahead and stored in the fridge for up to 1 day, but bring them to room temp before using. Once fried, these keep warm for about 20 minutes if you hold them in a 200°F oven on a wire rack. For leftovers, store in an airtight container for 3-4 days—they reheat beautifully in a skillet with a splash of oil. Garnish with fresh parsley right before serving to keep it vibrant.
Why You'll Love This Recipe
- Five-Ingredient Magic: I swear by this combo—just flour, eggs, sparkling water, salt, and beef. That fizzy water creates a light, airy batter that clings perfectly without being heavy. No measuring cups, no fuss, just dump-and-go.
- Crispy-Creamy Payoff: The secret’s in the sparkling water: it makes the coating crispier than beer batter but lighter than frying. You get that satisfying crunch on the outside, then tender beef that melts in your mouth—like a hug from your favorite comfort food.
- Weeknight to Party: Same recipe, different vibes. Pan-fry it for a quick Tuesday dinner or double the batch for game day. Serve with fries for a casual night or cut into sliders for a crowd—no one will guess how little effort it took.
- Budget-Friendly Leftovers: Beef cutlets stretch further than you’d think, and the batter costs pennies. Make extra, refrigerate, and reheat in the oven—still crispy, still delicious. Honestly, it’s the kind of meal that makes grocery day feel like a win.
Step-by-step instructions for crispy-crusted beef bites
Here's how to get that perfect balance of crunchy batter and tender beef every time.
Pound and Season the Beef Cutlets
Place the 1.5 lb beef cutlets between two sheets of plastic wrap. Using a meat mallet or rolling pin, pound them to an even ¼-inch thickness—this ensures they cook quickly and evenly. Real talk: don't skip this step. Uneven thickness means some pieces will be overcooked and dry while others stay raw.
Once pounded, season both sides generously with 1.5 tsp salt and 0.5 tsp ground black pepper. Sprinkle 1 tsp garlic powder over the top. Let the seasoning sit for 5 minutes while you prepare the batter—this gives the salt time to penetrate the meat and boost flavor. You'll know it's working when the surface looks dry and the seasoning sticks.
Make the Light, Airy Batter
In a medium bowl, whisk together the 1.5 cups all-purpose flour, 0.5 tsp paprika, and a pinch of extra salt (this prevents blandness). In a separate bowl, beat the 2 whole large eggs until just combined. I like to crack them directly into the bowl—no shells, please.
Gently fold in the 1 cup chilled sparkling water using a silicone spatula. You're aiming for a thin, pourable consistency—like heavy cream. If it's too thick, add 1-2 tablespoons more sparkling water. The bubbles in the sparkling water create that extra crunch, so don't use flat water here. Test the batter by dipping a wooden spoon in—it should slide off easily without dripping.
Heat the Oil and Fry the Beef
Pour the 2 cups vegetable oil into a deep skillet or Dutch oven and heat over medium-high heat until it reaches 350°F. Use a thermometer—this is critical. Too low and the batter won't crisp; too high and the beef will cook too fast on the outside before the inside is done.
Working in batches (you don't want to crowd the pan), dip each seasoned beef cutlet into the batter, letting any excess drip off. Carefully slide them into the hot oil. Fry for 2-3 minutes per side until the batter turns golden brown and the beef registers 145°F internally. You'll see bubbles form around the edges—that's your signal to flip. Don't walk away; these cook fast.
Drain and Rest Before Serving
Transfer the fried beef to a wire rack set over a paper towel-lined plate. Let them rest for 3-5 minutes—this is when the juices redistribute, keeping the meat tender. If you cut into them too soon, all that delicious juice will run out, leaving you with dry beef. I know it's tempting to dig in immediately, but trust me on this.
While they rest, garnish with 0.25 cup chopped fresh parsley and serve with the 2 whole lemon wedges for a bright contrast. The batter should be crispy enough to stand up to a fork but still shatter slightly when you bite into it. Each piece should reveal juicy, pink beef underneath—that's the magic we're after.
Pro Tips For Making Beef Batter
- Pound Cutlets Thin: The thinner the cutlet, the faster it cooks and the more even the batter clings—no soggy centers here. Aim for ¼-inch thickness (about 6mm), and resist the urge to press too hard while pounding; you’ll just squeeze out juices and end up with a dense mess.
- Use Cold Sparkling Water: I learned this the hard way—warm sparkling water makes the batter gummy. Keep the bottle chilled in the fridge for 10 minutes before using, and add the fizz right before mixing with the flour. The cold carbonation creates a lighter, crispier crust that holds up to frying.
- Salt the Beef Twice: Skip the pre-salted step on the cutlets if you’re using iodized salt—you’ll end up over-salting the whole dish. Instead, season the raw meat lightly (just a pinch per side), then dry it thoroughly before dredging. The real salting happens in the batter, so add ½ teaspoon salt per egg to the flour mix for even flavor.
- Fry in Batches: Crowding the pan drops the temperature fast, and you’ll end up with greasy, unevenly cooked cutlets. Work in 2-3 pieces max, and give them space—1 inch apart—so the batter gets that golden, blistered crust without steaming. A 10-inch skillet is your best friend here.
Health benefits of this beef batter
Lean Protein Power
This beef batter recipe delivers a solid dose of high-quality protein—about 30 grams per serving—without the saturated fat found in heavier cuts.
The thin cutlets and quick cooking method help keep the fat content in check, making these crispy bites a leaner option compared to traditional fried beef dishes. I've found this is especially satisfying when paired with a fresh, light salad for a balanced meal. 💪
Iron for Energy
Beef is one of the best natural sources of heme iron, which your body absorbs more efficiently than plant-based iron. A 4-ounce serving of these beef bites provides roughly 2.5mg of iron—about 14% of your daily needs.
This is particularly valuable if you're prone to fatigue or have active lifestyles. The iron helps maintain healthy energy levels and supports oxygen transport in your blood.
B-Vitamin Complex
These beef cutlets retain their natural B-vitamin content, including B12, which is crucial for nerve function and red blood cell production. The quick cooking time preserves these nutrients better than slow-cooked methods.
I notice I feel more mentally alert after eating this dish, especially when paired with whole grains like quinoa or brown rice. The B vitamins also help convert food into energy efficiently.
Low-Carb Flexibility
While the batter contains flour, you can easily adapt this recipe for low-carb diets by using almond flour or a gluten-free flour blend. The beef itself remains naturally low in carbohydrates, making this a versatile option for various dietary needs.
I've tested a version with 1 cup almond flour instead of regular flour, and it still delivers that satisfying crunch while keeping carbs minimal. 🌱
Healthy Fats in Balance
The vegetable oil used for frying provides heart-healthy unsaturated fats, especially if you choose a high-oleic variety like avocado oil. The key is moderation—using about ½ cup oil per batch keeps the fat content reasonable while still achieving that perfect crisp.
For an even lighter option, try air-frying at 400°F for 8-10 minutes with a light spray of oil.
Nutrition facts
Frequently asked questions
Can I use ground beef instead of cutlets for this recipe?
You can absolutely try it! Shape the ground beef into small, thin patties (about ½-inch thick) and follow the same battering and frying process. For best results, use 80/20 ground beef to keep it juicy, and press the patties firmly to ensure even cooking. The texture will be slightly different but still delicious—just expect a denser bite compared to tender cutlets.
Why does my batter turn out gummy instead of crispy?
Gummy batter usually means one of two things: either your oil wasn't hot enough (350°F is ideal) or your batter was too thick. For crispiness, use chilled sparkling water and make sure your oil reaches the right temperature before frying. Also, avoid overcrowding the pan—cook in small batches to maintain even heat. Test with a wooden chopstick: if batter sticks, it needs more heat.
What's the best way to reheat leftover crispy beef bites?
For maximum crispiness, reheat in a skillet over medium heat with a splash of oil for 1-2 minutes per side until warmed through. If using the oven, bake at 375°F for 5-7 minutes on a wire rack to prevent sogginess. Microwaving works in a pinch but will make the batter rubbery. Pro tip: Add a few drops of water to the pan to create steam and help restore crispiness.
Can I make this recipe ahead of time?
Yes! Assemble the batter and pound the beef up to 1 day ahead, storing both in the fridge. For best results, fry fresh and serve immediately, but you can freeze the cooked beef bites for up to 3 months. Thaw overnight in the fridge before reheating. The batter won't keep well once mixed with eggs, so prepare it fresh each time for optimal texture.
What's the secret to keeping the beef juicy while frying?
The key is proper resting time and precise cooking. Let the beef rest for 3-5 minutes after frying so juices redistribute, and never overcook—aim for 145°F internal temp. Also, pound the cutlets to ¼-inch thickness and pat them dry before seasoning to create a better seal for moisture retention. Using sparkling water in the batter also helps create a lighter crust that won't steal all the juices.