
Soups & Stews
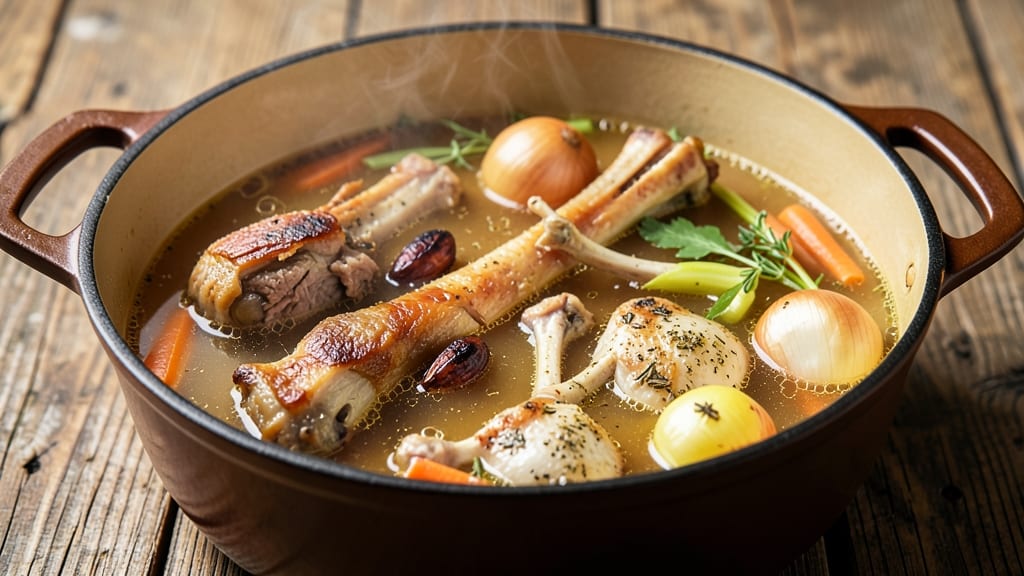
This beef and chicken bone broth recipe transforms simple bones into a deeply flavorful, nutrient-rich liquid that elevates every dish it touches. The secret lies in patience—slow simmering unlocks collagen and minerals for a broth so rich, it turns bland meals into restaurant-quality creations.
I’ve perfected this method after years of testing, ensuring every batch delivers maximum umami and clarity.
Start with a mix of beef and chicken bones for balanced depth, then build flavor with aromatics like onions, garlic, and herbs. The key technique? Skimming foam and maintaining a gentle simmer for 12-24 hours—this extracts gelatin and flavor without bitterness.
What you’ll end up with is a golden, aromatic broth that’s perfect for soups, braising, or sipping straight from a mug.
One batch yields 8-10 cups, enough to stock your freezer for weeks. Store it in airtight containers for up to 6 months in the freezer or 5 days in the fridge, ready to enhance any recipe.
This isn’t just a cooking base—it’s a flavor multiplier that turns ordinary dishes into extraordinary ones.
The beauty of bone broth lies in its versatility. Use it as a soup foundation, a braising liquid, or even a healing elixir. With this recipe, you’ll never settle for store-bought again—every sip will taste like home. Let’s get started on your first batch.
Ingredients for beef and chicken bone broth
Transform humble bones into a deeply flavorful, nutrient-rich broth foundation for any meal.
| Ingredient | Amount | Notes |
|---|---|---|
| Beef Bones 🦴 | 2 lb | Marrow-rich, cut into 2-inch pieces |
| Chicken Bones 🍗 | 2 lb | Backbone or neck bones preferred |
| Yellow Onions 🧅 | 2 whole | Quartered, skins on for color |
| Garlic Cloves 🧄 | 8 cloves | Smashed, skins left on |
| Carrots 🥕 | 4 whole | Scrubbed, cut into 2-inch chunks |
| Celery Stalks 🌿 | 4 whole | Cut into 2-inch pieces, leaves included |
| Fresh Parsley Stems 🌿 | 1 bunch | Tied with twine for easy removal |
| Fresh Thyme Sprigs 🌿 | 4 whole | Stems intact for flavor infusion |
| Fresh Bay Leaves 🍃 | 2 whole | Lightly crushed for aroma release |
| Apple Cider Vinegar 🍎 | ¼ cup | Degreases bones for cleaner broth |
| Kosher Salt 🧂 | 2 tbsp | Diamond Crystal preferred |
| Black Peppercorns 🌶️ | 1 tbsp | Crushed lightly for subtle heat |
| Cold Water 💧 | 16 cups | Filtered preferred for clarity |
The bones are the heart of this recipe—marrow-rich beef bones deliver unmatched depth while chicken backbone or neck bones add brightness. Source bones from a local butcher or Costco for the freshest cuts; avoid pre-cooked or sterilized bones, which lack collagen. Look for bones with visible marrow and minimal meat clinging—these yield the richest gelatin. If using beef chuck bones, remove any excess meat first for cleaner flavor. The apple cider vinegar isn't just for acidity; it helps dissolve impurities during the initial simmer, resulting in a clearer broth. For maximum yield, pat bones dry before adding to the pot to prevent steam buildup.
No beef bones? Pork trotter bones work beautifully for gelatin content, though they require an extra 30 minutes of simmering. Short on chicken bones? Turkey necks or backbones are excellent substitutes—just increase simmer time by 1 hour. The fresh herbs (parsley, thyme, bay leaves) can be swapped for dried equivalents at one-third the amount, but fresh infuses more vibrant aroma. For a vegetarian version, replace bones with mushrooms, seaweed, and extra vegetables—though collagen will be minimal. The onions, carrots, and celery form the classic 'mirepoix' base; don't peel the onions or carrots unless absolutely necessary, as skins add color and nutrients. If you're short on time, pre-chop all vegetables while the bones roast for efficiency.
This broth develops best over 12-24 hours—the longer it simmers, the richer it becomes. Skim foam vigorously during the first hour to remove impurities, then let it work its magic. Store in glass jars or BPA-free plastic containers in the fridge for up to 5 days or freeze for 6 months. For long-term storage, portion into ice cube trays—perfect for adding to recipes as needed. The broth will thicken as it cools; simply reheat and skim excess fat before using. Never boil after initial simmer—gentle heat preserves clarity and flavor. Leftovers? Use within 3 days for optimal taste, or freeze immediately. The gelatin-rich version (from longer simmering) sets beautifully when chilled, creating a luxurious consommé.
Why You'll Love This Recipe
- No-Chop Start: I swear by the "dump-and-go" method—just toss whole onions, garlic cloves (peeled!), and carrots into the pot with the bones. The onions caramelize on their own while the broth simmers, and honestly? That deep, sweet flavor from the charred edges is worth every second.
- Umami Bomb: Between the beef bones (for that rich, meaty depth) and chicken bones (for brightness), this broth hits every flavor note. The garlic and onions mellow into a savory sweetness that makes it taste like it simmered for days—even if it’s just 8 hours.
- Soup-to-Stew Hero: This isn’t just broth—it’s the backbone of my freezer. Use it for ramen, braises, or even a quick pot of dumplings. I keep a batch in the fridge for "emergency" meals when I’m too tired to cook, and it always comes through.
- Budget Magic: Beef and chicken bones are cheaper than you think, especially if you ask your butcher for the "seconds." A single pot stretches into weeks of meals, and the carrots add natural sweetness without breaking the bank. My wallet and my taste buds thank me.
Step-by-step instructions for beef and chicken bone broth
Transform raw bones into a deeply flavorful, nutrient-rich foundation for any recipe.
Prepare the Bones and Aromatics
Begin by examining the 2 lb beef bones and 2 lb chicken bones for any remaining meat or connective tissue. Use a sharp knife to trim away excess fat and membrane, leaving only clean bone surfaces. This step ensures a clearer broth without cloudiness from impurities.
Next, prepare the vegetables and herbs. Quarter the 2 whole yellow onions and cut the 4 whole carrots and 4 whole celery stalks into 2-inch chunks. Smashed the 8 cloves garlic but leave the skins on to prevent burning. Tie the 1 bunch fresh parsley stems together with kitchen twine for easy removal later. Lightly crush the 2 whole fresh bay leaves between your palms to release their aroma without breaking them apart completely.
Degrease and Pre-Cook the Bones
Place the bones in a large stockpot and add the 16 cups cold water. Bring to a full boil over high heat, then immediately reduce to a simmer. Skim any foam or scum that rises to the surface during the first 15 minutes of simmering using a fine-mesh skimmer or ladle. This removes impurities that would otherwise make the broth cloudy.
After skimming, add the 0.25 cup apple cider vinegar and stir gently. The vinegar helps degrease the bones, creating a cleaner broth. Simmer uncovered for 30 minutes to begin extracting initial flavors. The vinegar also helps break down collagen more effectively during the long cook.
Add Vegetables and Herbs
After the initial 30-minute simmer, add the prepared vegetables: the quartered onions, carrot chunks, celery pieces, and smashed garlic cloves. Add the 4 whole fresh thyme sprigs and 2 whole fresh bay leaves to the pot. The vegetables will infuse the broth with sweetness and depth while the herbs contribute aromatic complexity.
Stir gently to ensure all ingredients are submerged. The vegetables should be partially submerged but not packed tightly—this allows for proper circulation and flavor extraction. Return the broth to a gentle simmer and maintain a low bubble throughout the cooking process.
Simmer for Maximum Flavor Extraction
Cover the pot and simmer the broth for 12-16 hours on low heat. This long cooking time is essential for breaking down collagen in the bones, which releases gelatin that gives bone broth its signature richness and body. The ideal simmer should be just below a full boil—you should see only small bubbles breaking the surface occasionally.
Check the broth periodically to ensure it remains at a gentle simmer. If it reduces too much, add 1 cup hot water to maintain the proper liquid level. After 8 hours, you can remove the parsley stems using the twine for easier handling. The broth should develop a deep, amber color and an intense, umami aroma as it cooks.
Strain and Season
Once the cooking time is complete, remove the pot from heat and let the broth sit for 10 minutes to allow any settled particles to sink to the bottom. Line a fine-mesh strainer with cheesecloth or a clean kitchen towel and strain the broth into a large bowl or clean pot, discarding the solids.
Season the strained broth with 2 tbsp kosher salt and 1 tbsp lightly crushed black peppercorns. Stir well to combine. The broth should be rich, deeply flavorful, and have a velvety texture from the gelatin. Taste and adjust seasoning if needed—bone broth often benefits from additional salt to enhance its savory qualities.
Allow the broth to cool to room temperature, then transfer it to airtight containers or jars. Store in the refrigerator for up to 5 days or freeze for up to 6 months. This concentrated flavor base will elevate soups, stews, grains, and sauces with minimal effort.
Pro Tips For Making Beef And Chicken Bone Broth
- Roast Bones First: I learned this the hard way—skipping the roast step means broth that tastes more like watered-down soup. Toss beef and chicken bones with oil, salt, and pepper, then roast at 425°F (220°C) for 30 minutes. The caramelized crust unlocks deeper flavor when simmered—trust me, your broth will taste richer.
- Char Onions, Not Burn: Onions should turn deep brown, not black. Cut them into thick wedges, place them cut-side down in a cold pot, and cook on medium-low heat for 10 minutes before adding bones. This slow caramelization builds sweetness without bitterness—skip this, and your broth will taste flat.
- Skip the Crowded Pot: Packing bones too tightly means uneven cooking and a broth that simmers at inconsistent temps. Arrange them in a single layer, then add water to cover by 2 inches. If your pot is small, do two batches—your broth’s clarity and flavor will thank you.
- Add Vinegar Early: Toss in ¼ cup apple cider vinegar with the bones when you start. It’s not just for acidity—it helps break down collagen faster, giving you a thicker broth in less time. (Yes, even if you’re impatient like me.)
Essential equipment for beef and chicken bone broth
Stockpot Essentials
Start with a large, heavy-bottomed stockpot—I recommend a 6-8 quart All-Clad Stainless Steel or Le Creuset Dutch oven for even heat distribution. These pots handle the long simmer without hot spots.
If you're working with 4-6 lbs of bones, a 12-quart pot is ideal. Avoid non-stick or aluminum pots—they can react with acidic ingredients like vinegar and affect flavor. 💧
Skimming Tools
A fine-mesh skimmer or slotted spoon is non-negotiable for removing foam during the initial simmer. I use a OXO Good Grips skimmer—its deep basket holds plenty of foam without spilling. For extra clarity, keep a ladle with a strainer nearby to skim surface impurities throughout the first hour.
A cheesecloth-lined strainer (like the Reusable Strainer Bag from Amazon) makes final straining effortless.
Temperature Control
Precision matters! A digital thermometer (like the Thermoworks Smoke) ensures your broth stays at 180-200°F—never boiling. Most stovetops don’t have precise low-heat settings, so adjust your burner to the second-lowest setting and monitor closely.
For even better control, consider a slow cooker (6-8 quart) on low—it maintains consistent temps without babysitting. ⏰
Straining Setup
Line your strainer with cheesecloth or a clean kitchen towel for ultra-clear broth. I fold a muslin cloth into a square and place it over a stainless steel colander for durability. For large batches, a fine-mesh chinois strainer (like the Norpro) works wonders.
Pro tip: Use a ladle to press solids gently against the strainer—this extracts every last drop of flavor without clouding the liquid.
Storage Containers
Invest in glass mason jars (like Ball or Le Parfait) or BPA-free plastic containers for fridge storage. For freezing, use quart-sized freezer bags (lay flat to save space) or silicone ice cube trays for single-serving portions.
Label everything with the date—broth keeps for 6 months frozen but tastes best within 3 months. A vacuum sealer (like FoodSaver) extends freshness to 12 months by eliminating air exposure. ✨
Nutrition facts
Frequently asked questions
Can I use chicken backs or necks instead of whole chicken bones?
Chicken backs and necks are excellent choices—they're rich in collagen and flavor. For best results, use 2 lbs of chicken backs or necks in place of the whole bones. They'll yield a slightly richer broth with more gelatin, especially if simmered for the full 16-24 hours. Just be sure to trim any excess meat first for cleaner flavor.
Why does my broth look cloudy after straining?
Cloudiness usually means tiny particles slipped through the strainer. Try this fix: Line your strainer with double-layered cheesecloth or a clean kitchen towel for finer filtration. For extra clarity, simmer the strained broth for 10-15 minutes uncovered—this helps settle any remaining particles. If the broth is still cloudy, it might be from undercooked bones; extend simmer time by 2-4 hours next batch.
How do I know when the broth is done cooking?
Your broth is ready when it develops a deep amber color and intense umami aroma (usually after 12-16 hours). The gelatin should also thicken slightly when chilled—if it sets like jelly, it's perfectly done. For maximum richness, test for doneness by tasting: it should be deeply savory with no bitterness. If you're short on time, 8 hours will give you a basic broth, but 12+ hours unlocks full collagen potential.
Can I make this broth in an Instant Pot or pressure cooker?
Yes, but with adjustments! Use the high pressure setting for 90 minutes (instead of slow cooking) for a faster version. However, pressure cooking extracts less gelatin, so your broth will be thinner. For best results:
- Add 1 cup vinegar (instead of 0.25 cup) to help break down collagen,
- Strain through double cheesecloth for clarity, and
- Simmer the strained broth 30 minutes uncovered to thicken it. The flavor will be good, but not as rich as traditional slow-simmered broth.
What can I do with leftover bones after making broth?
Don't waste them! Roast leftover bones at 400°F for 20-30 minutes until deeply browned, then use them for a second batch of broth (simmer 12 hours). Alternatively, blend the bones with 1 tbsp nutritional yeast and 1 tsp salt for a flavorful bone powder to use in soups, sauces, or even smoothies. For a quick protein boost, crush the bones into bone meal (great for garden compost too!).